Imagine being able to tackle all your DIY projects with a single tool that not only simplifies your tasks but also saves you time and effort. The quest for the ultimate DIY tool has captivated many enthusiasts, but the answer to this age-old question remains elusive. From hammers to drills, wrenches to saws, each tool has its purpose, but which one truly reigns supreme? In this article, we will explore various tools and their functionalities, ultimately uncovering the most useful tool for DIY projects. Prepare to revolutionize your DIY game with this must-have tool.
Hammer
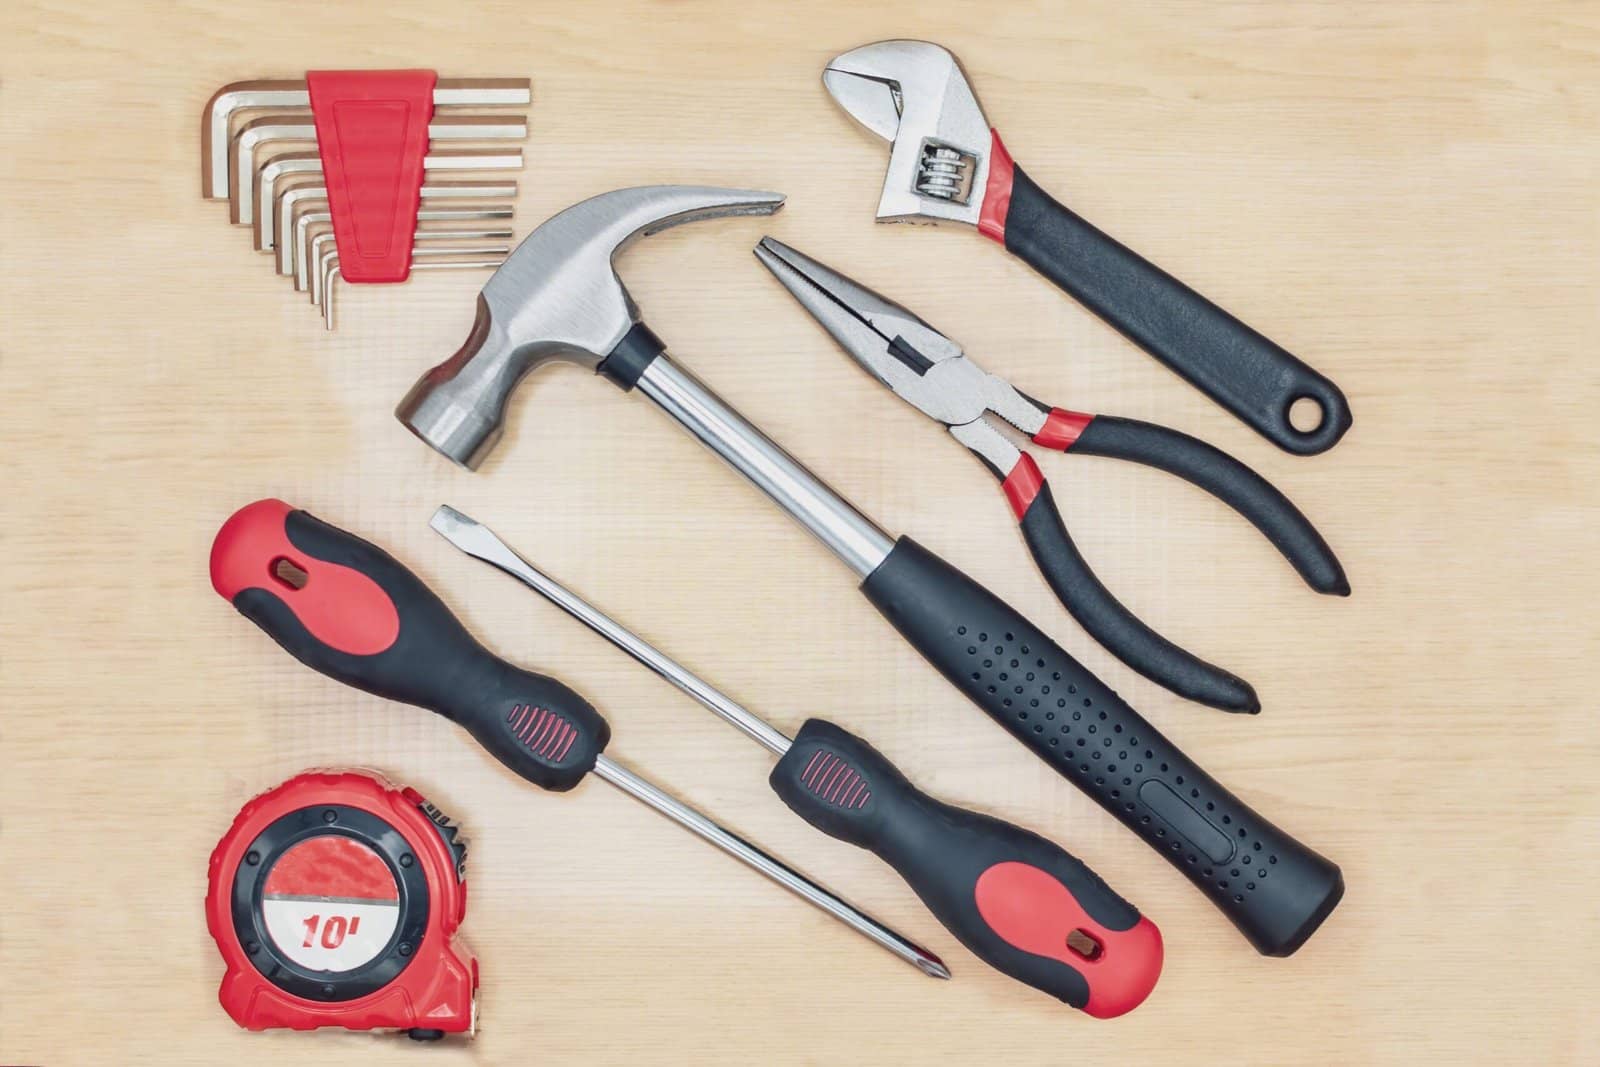
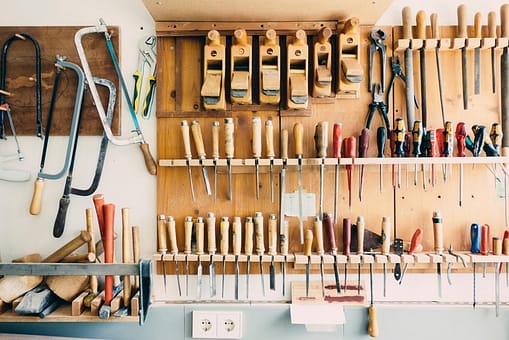
A hammer is a versatile tool that every DIY enthusiast should have in their toolbox. It comes in various types, each designed for specific tasks. The most common types of hammers include claw hammers, ball-peen hammers, sledgehammers, and rubber mallets.
Types of hammers
- Claw hammer: This is the most common type of hammer that you will find in every household. It has a flat face for pounding nails and a curved claw for removing nails or prying objects apart.
- Ball-peen hammer: This hammer features a flat face on one side and a rounded peen on the other. It is mainly used for shaping metal or striking punches.
- Sledgehammer: A sledgehammer is a heavy-duty hammer with a long handle. It is used for heavy demolition work and driving stakes.
- Rubber mallet: Unlike other hammers, a rubber mallet is made with a rubber head. It is commonly used in woodworking projects where you need to strike delicate materials without damaging them.
Common uses for a hammer
The primary use of a hammer is for driving and removing nails. Whether you want to hang a picture frame, assemble furniture, or build a wooden structure, a hammer is essential to secure the materials together. It is also handy for breaking things apart, like demolishing small structures or removing old tiles.
Tips for using a hammer
- Hold the hammer firmly: To ensure accuracy and prevent slippage, grip the hammer with your dominant hand and wrap your non-dominant hand around the base of the handle for stability.
- Aim for the center: When driving a nail, aim for the center of the nailhead to prevent it from bending or splitting the wood.
- Start with light taps: Instead of using excessive force initially, start with light taps to create a pilot hole. This helps to guide the nail and prevents it from slipping.
- Use the claw for leverage: When removing nails, position the claw of the hammer under the nailhead and apply steady pressure while rocking the hammer back and forth to pull it out.
- Wear safety goggles: Always wear safety goggles when using a hammer to protect your eyes from flying debris.
Screwdriver
A screwdriver is another invaluable tool for any DIY enthusiast. It allows you to tighten or loosen screws, making it an essential tool for assembling furniture, fixing appliances, or performing electrical work.
Types of screwdrivers
- Flat-head screwdriver: This is the most common type of screwdriver, characterized by a flat blade. It is used for screws with a single horizontal groove.
- Phillips screwdriver: The Phillips screwdriver has a cross-shaped tip and is designed for screws with a corresponding cross-shaped indentation. It is commonly used in electronics and appliances.
- Torx screwdriver: A Torx screwdriver features a six-pointed star-shaped tip. It is used for screws commonly found in automobiles and appliances.
Common uses for a screwdriver
The primary function of a screwdriver is to drive or remove screws. It is often used in furniture assembly, home repairs, and electronics. You can use a screwdriver to tighten loose screws on door handles, hinges, or electronics. It is also handy for removing screws when disassembling objects or replacing worn-out parts.
Tips for using a screwdriver
- Use the correct size: Ensure that you use the correct size of screwdriver for the screw you are working with to avoid damaging the screw head or the tool itself.
- Apply steady pressure: When turning a screw, apply steady pressure and avoid using excessive force, as this can cause the screwdriver to slip and damage the screw or surrounding materials.
- Hold the screwdriver firmly: Grip the handle of the screwdriver firmly with your dominant hand to have better control and accuracy when turning the screw.
- Watch your fingers: Be careful not to pinch your fingers between the handle and the object you are working on. Place your fingers away from the rotating parts to prevent injuries.
- Store screwdrivers properly: To prevent damage and maintain the longevity of your screwdrivers, store them in a tool organizer or container where they won’t get bent or damaged.
Power Drill
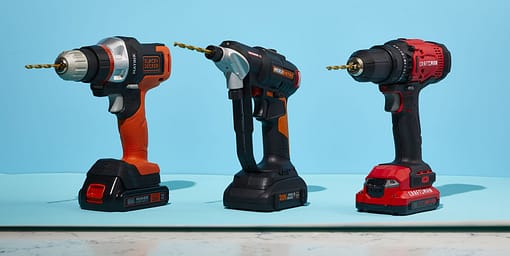
A power drill is a must-have tool for any DIY enthusiast, as it speeds up tasks that would otherwise take significant effort and time. It is used for drilling holes, driving screws or bolts, and even mixing paint or plaster.
Types of power drills
- Cordless drill: A cordless drill is powered by a rechargeable battery, offering portability and convenience. It is best suited for small to medium drilling and driving tasks.
- Corded drill: A corded drill requires a power outlet for operation. It offers more consistent power and is suitable for heavy-duty drilling or prolonged use.
- Impact driver: An impact driver is designed specifically for fastening screws and bolts. It delivers high torque and is useful for tasks that require extra force, like driving screws into dense materials.
Common uses for a power drill
A power drill is a versatile tool with a wide range of applications. Some common uses include:
- Drilling holes: Whether you need to hang shelves, install curtain rods, or create a pilot hole for larger screws, a power drill makes the task quick and effortless.
- Driving screws or bolts: A power drill with a screwdriver bit allows for fast and efficient driving of screws or bolts into various materials, such as wood or drywall.
- Mixing paint or plaster: Some power drills come with a mixing attachment, making them ideal for mixing paint, adhesive, or compounds.
Tips for using a power drill
- Choose the right drill bit: Select the appropriate drill bit based on the material you are drilling into. Different materials require different drill bits to achieve optimal results.
- Start with a pilot hole: If you are drilling into hard materials, it is advisable to start with a smaller drill bit to create a pilot hole. This helps to guide the larger bit and prevents it from slipping.
- Use the correct speed and torque settings: Most power drills have adjustable speed and torque settings. Use higher speeds for drilling and lower speeds for driving screws or bolts. Adjust the torque setting according to the hardness of the material to avoid stripping screws or damaging the surface.
- Keep the drill perpendicular: When drilling holes, make sure to hold the drill perpendicular to the surface to achieve a straight and accurate hole.
- Wear hearing protection and safety glasses: Power drills produce noise and can generate flying debris. Protect your ears with earmuffs or earplugs and wear safety glasses to safeguard your eyes.
Remember, practice makes perfect when it comes to using a power drill. Start with small projects and gradually work your way up to more complex tasks.
Circular Saw
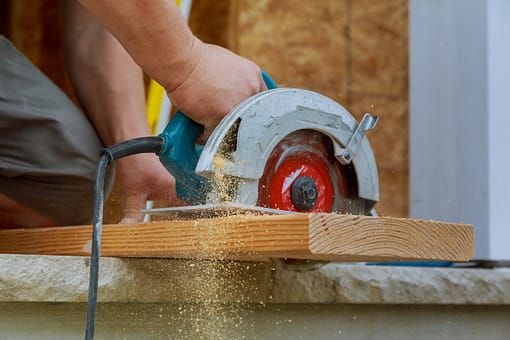
A circular saw is a powerful cutting tool commonly used in woodworking and construction projects. It is designed for making straight cuts in a variety of materials, including wood, plastic, and metal.
Types of circular saws
- Sidewinder circular saw: This is the most common type of circular saw, in which the motor is positioned on the side of the blade. It is lightweight, compact, and suitable for most DIY projects.
- Worm-drive circular saw: A worm-drive circular saw has the motor positioned behind the blade. It delivers more torque and is favored by professionals for heavy-duty applications.
- Trim circular saw: As the name suggests, a trim circular saw is used for precision trimming and cutting in woodworking projects. It is smaller in size compared to sidewinder and worm-drive saws.
Common uses for a circular saw
A circular saw is a versatile tool that can tackle a wide range of cutting tasks. Some common uses include:
- Cutting lumber: Whether you’re building a deck, framing a wall, or constructing furniture, a circular saw is perfect for making straight and accurate cuts in lumber.
- Ripping plywood: If you need to cut plywood into narrower strips, a circular saw is the go-to tool. It ensures smooth and precise cuts, making it easier to work with.
- Trimming flooring or baseboards: When installing flooring or baseboards, a circular saw enables you to make clean and precise cuts, allowing for a seamless finish.
Tips for using a circular saw
- Measure and mark accurately: Before making any cuts, measure and mark the material accurately to ensure that your cuts are precise and aligned.
- Use a guide rail or straightedge: To make straight cuts, use a guide rail or a straightedge as a guide for the circular saw’s base plate. This helps to ensure a smooth and accurate cut.
- Secure the workpiece: When cutting, make sure the workpiece is firmly secured to prevent movement or slipping. This ensures safety and helps to maintain the accuracy of your cuts.
- Adjust the blade depth: Set the blade depth just enough to cut through the material without going too deep. This minimizes the risk of kickback and ensures cleaner cuts.
- Use proper safety precautions: Always wear safety glasses, hearing protection, and gloves when using a circular saw. It is also advisable to wear a dust mask to protect yourself from sawdust.
Remember, circular saws can be powerful and potentially dangerous if not used with caution. Practice proper technique, take your time, and prioritize safety.

Measuring Tape
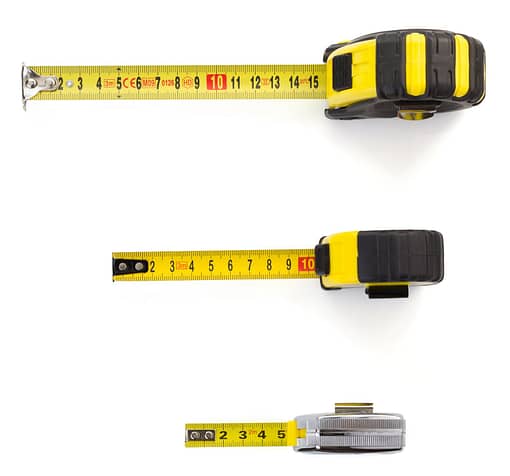
A measuring tape is an essential tool for any DIY project that involves accurate measurements. It allows you to measure distances, dimensions, and angles accurately, ensuring a precise fit and finish.
Types of measuring tapes
- Standard measuring tape: This is the most common type of measuring tape, available in various lengths. It features both metric and imperial measurements, making it versatile for different projects.
- Long tape measure: Long tape measures are designed for measuring longer distances, typically used in construction or outdoor projects. They often have a reel or winding mechanism for easy storage.
- Laser measuring device: Laser measuring devices use a laser beam to determine distances. They are ideal for measuring large spaces or hard-to-reach areas accurately.
Common uses for a measuring tape
A measuring tape can be used in numerous DIY projects. Some common uses include:
- Taking measurements for furniture: When buying or building furniture, a measuring tape is crucial for ensuring that it fits in the desired space. It allows you to measure the length, width, and height accurately.
- Hanging pictures or shelves: A measuring tape helps you determine the exact placement of pictures or shelves, ensuring they are aligned and centered properly.
- Measuring spaces for renovation: Whether you’re remodeling a room or adding new features, a measuring tape helps you calculate the amount of material needed, such as paint, wallpaper, or flooring.
Tips for using a measuring tape
- Use the same unit of measurement: It is important to use either metric or imperial measurements consistently throughout your project to avoid confusion or inaccurate calculations.
- Hold the tape securely: When measuring, make sure to hold the tape securely at the starting point to avoid it slipping or bending, which can affect the accuracy of your measurements.
- Read the measurement accurately: Double-check the measurement by looking at the tape from directly above, ensuring that the end of the tape lines up precisely with the marking or object being measured.
- Consider the width of the tape: If you need to measure the inside of a space, such as a window frame or a drawer, take into account the width of the measuring tape to ensure an accurate fit.
- Avoid stretching the tape: When pulling the tape measure, avoid stretching it too far, as this can affect the measurements. Instead, keep it taut but not overly tight.
By using a measuring tape correctly and taking accurate measurements, you can ensure that your DIY projects are precise and well-fitted.
Utility Knife
A utility knife is a versatile cutting tool that every DIY enthusiast should have in their arsenal. It is designed for precision cutting, making it suitable for a myriad of tasks, from opening boxes to cutting materials like carpet or wallpaper.
Types of utility knives
- Retractable utility knife: The retractable utility knife is the most common type, featuring a blade that can be extended or retracted depending on the desired length. This design ensures safety when the knife is not in use.
- Snap-off blade utility knife: This type of utility knife has a segmented blade that can be snapped off to reveal a fresh, sharp section. It is convenient when you need a new or sharper edge during a project.
- Fixed-blade utility knife: Fixed-blade utility knives have a blade that cannot be retracted. They are generally sturdier and more durable, making them suitable for heavy-duty cutting tasks.
Common uses for a utility knife
A utility knife is incredibly versatile and can be used for various tasks, such as:
- Opening packages: Whether it’s a delivery package or a sealed box, a utility knife allows you to make precise cuts without damaging the contents inside.
- Cutting materials: Utility knives are ideal for cutting materials like carpet, linoleum, wallpaper, or even foam insulation. Their sharp blades provide accuracy and control in achieving clean cuts.
- Removing caulk or sealant: The sharp edge of a utility knife can be used to cut and remove old caulk or sealant, making it easier to reapply new materials.
- Trimming edges or sharpening pencils: When you need to trim excess or uneven edges, a utility knife offers precision and control. It can also be used to sharpen pencils or score materials for folding.
Tips for using a utility knife
- Replace blades when dull: A dull blade can be hazardous and may not provide clean cuts. Replace the blade when it starts to dull or become difficult to cut with.
- Retract the blade when not in use: To prevent accidents or injuries, always retract the blade fully when not actively using the utility knife. Keep it stored in a safe place away from children or pets.
- Use the right cutting surface: When cutting materials, make sure you have a suitable cutting surface, such as a cutting mat or sturdy surface. This protects your work area and prolongs the life of the blade.
- Apply steady pressure: When cutting, apply steady, controlled pressure to achieve clean and precise cuts. Avoid forcing the blade, as this can lead to slips or damage the material.
- Dispose of used blades safely: Used blades can be sharp and pose a safety hazard. Keep a designated container or blade disposal box for safe disposal once blades become dull or unusable.
Remember to exercise caution when using a utility knife to prevent accidents. Always use it in a well-lit area, keep your fingers clear of the cutting path, and wear gloves when necessary.
Adjustable Wrench
An adjustable wrench, also known as a crescent wrench, is a versatile tool that allows you to tighten or loosen nuts and bolts of various sizes. It is an essential tool for plumbing, automotive repairs, or any project that involves fastening or loosening different-sized fasteners.
Types of adjustable wrenches
- Crescent wrench: This is the most common type of adjustable wrench. It has a movable jaw that can be adjusted to fit different sizes of nuts and bolts.
- Pipe wrench: A pipe wrench is a variant of an adjustable wrench, designed specifically for gripping and turning pipes and rounded objects. It has sharp teeth that grip tightly onto the pipe or round surface.
Common uses for an adjustable wrench
An adjustable wrench can be used in a wide range of projects, including:
- Plumbing repairs: Whether you need to tighten a leaking pipe connection or remove a stubborn faucet, an adjustable wrench provides the necessary grip and torque for plumbing tasks.
- Bicycle maintenance: An adjustable wrench is handy for adjusting or replacing parts on your bicycle, such as the pedals, handlebars, or seat.
- Furniture assembly: When assembling furniture, an adjustable wrench is useful for tightening bolts or nuts, ensuring stability and durability.
Tips for using an adjustable wrench
- Choose the right size: Adjust the wrench jaw to fit the size of the nut or bolt you are working with. Ensure a snug fit to prevent slipping or rounding of the fastener.
- Position the wrench correctly: When using an adjustable wrench, make sure the wrench is positioned perpendicular to the fastener. This ensures maximum grip and minimizes the risk of slipping.
- Pull, don’t push: When tightening or loosening a fastener, apply the force in the direction that allows you to pull on the wrench. Pushing may cause the wrench to slip or lose grip.
- Use additional support: If the fastener is particularly tight or stubborn, you can use a longer wrench or add a pipe over the handle for extra leverage. Be cautious not to overexert force, as it might damage the fastener or wrench.
- Keep the wrench clean and lubricated: Periodically clean your adjustable wrench and lubricate the moving parts to ensure smooth adjustments and prevent rust or corrosion.
An adjustable wrench is a versatile tool that can save you time and effort in various DIY projects. With the ability to accommodate different sizes, it is a valuable addition to any toolbox.
Pliers
Pliers are incredibly versatile hand tools that come in a variety of shapes and sizes. They are designed to grip, twist, bend, cut, or shape various materials, making them indispensable in many DIY projects.
Types of pliers
- Combination pliers: Combination pliers, also known as lineman’s pliers, have a flat gripping surface with serrated jaws. They can be used for gripping, cutting wires, and bending materials.
- Long-nose pliers: Long-nose pliers have long, tapered jaws with a pointed tip. They are ideal for precise tasks, such as bending wires, reaching into tight spaces, or holding small objects.
- Slip-joint pliers: Slip-joint pliers have an adjustable pivot point that allows for different jaw widths, offering versatility when gripping various-sized objects.
- Locking pliers: Locking pliers, also known as Vise-Grip pliers, have a built-in locking mechanism that secures the jaws in place, providing a strong and reliable grip on materials.
Common uses for pliers
Pliers can be used in a wide range of DIY projects, including:
- Electrical work: Pliers are essential for stripping, cutting, and bending wires during electrical installations or repairs.
- Plumbing repairs: Pliers help to tighten or loosen pipe fittings, remove stubborn nuts or bolts, or fix leaky pipes.
- Jewelry making: Pliers are commonly used in jewelry making for wire shaping, beadwork, or attaching findings.
- DIY crafting: Whether you’re working with clay, fabric, or metal, pliers are versatile tools for manipulating materials and achieving desired shapes.
Tips for using pliers
- Choose the right type of pliers: Select pliers that are suitable for the task at hand. Different types of pliers are designed for specific applications, so using the appropriate pliers ensures better results.
- Grip materials securely: When using pliers, grip the material firmly but not excessively tight to avoid damaging or deforming it. Adjust the pressure according to the material’s strength.
- Position pliers correctly: Position the pliers so that the pivot point or joint is closest to the material you are gripping. This ensures maximum leverage and control.
- Use additional support if necessary: For tasks that require more strength, you can use a longer pair of pliers or increase leverage by adding a pipe or extension to the handles.
- Use the cutting edge properly: If your pliers have a cutting edge, avoid cutting materials that are too hard or large for the pliers. This can damage the cutting edge or even break the pliers.
Remember to choose the right type of pliers for each job, respect the tool’s limitations, and wear protective gloves when handling sharp or potentially hazardous materials.
Level
A level is a tool used to determine whether a surface or object is perfectly horizontal (level) or vertical (plumb). It is an essential tool for DIY projects that require accurate alignment, such as hanging shelves, installing cabinets, or building structures.
Types of levels
- Spirit level: This is the most common type of level, consisting of a long, rectangular frame with a transparent tube filled with liquid and an air bubble. The air bubble indicates whether the surface is level or plumb.
- Torpedo level: A torpedo level is a compact level with a smaller size and a more tapered shape. It is ideal for tight spaces or smaller projects.
- Laser level: Laser levels use laser beams to create a straight line or reference point. They are often used in construction, large-scale projects, or when high precision is required.
Common uses for a level
A level is used in various DIY projects to ensure precise alignment and symmetry. Some common uses include:
- Hanging pictures or mirrors: A level is crucial for ensuring that pictures, mirrors, or other wall decorations are straight and aligned correctly.
- Installing shelves or cabinets: When installing shelves or cabinets, using a level ensures that they are level and not slanted, providing stability and aesthetic appeal.
- Building structures: When constructing structures like walls, decks, or pergolas, a level is used to ensure that they are level or plumb, guaranteeing their structural integrity.
Tips for using a level
- Choose the right level for the job: Consider the size of the project and the level of precision required when selecting a level. A larger spirit level may be more suitable for larger projects, while a torpedo level is great for smaller tasks.
- Position the level correctly: Place the level directly on the surface you want to check, ensuring that it is parallel to the reference line or object. Make adjustments until the bubble is centered between the level’s lines.
- Check multiple points: To ensure accuracy, check the level at multiple points along the surface or object. This helps identify any discrepancies or unevenness.
- Secure the level: If you need both hands free during a project, secure the level in place using clamps or by asking someone to hold it for you.
Using a level allows you to achieve professional-looking results in your DIY projects. Take your time, double-check the level at various points, and make the necessary adjustments for a perfectly aligned finish.
Safety Glasses
Safety glasses are a vital piece of personal protective equipment (PPE) for any DIY enthusiast. They protect your eyes from potential hazards, including flying debris, dust, or chemical splashes.
Types of safety glasses
- Safety goggles: Safety goggles have a full enclosure around the eyes, providing protection from all angles. They are ideal for tasks that involve high-velocity particles or potential chemical exposure.
- Safety glasses with side shields: Safety glasses with side shields offer protection against objects or particles coming from the sides. They are commonly used in construction, woodworking, or DIY projects.
- Over-glasses safety glasses: Over-glasses safety glasses are designed to fit over prescription glasses. They provide an additional layer of eye protection for individuals who require corrective lenses.
Importance of wearing safety glasses
Wearing safety glasses is crucial for protecting your eyes from potential hazards. Here’s why:
- Eye protection: Safety glasses shield your eyes from flying debris, dust, or particles that could cause serious injury or damage to your eyes.
- Chemical splashes: When working with chemicals or performing tasks that involve potential splash hazards, safety glasses with appropriate seals or goggles provide a barrier against harmful substances.
- UV protection: Some safety glasses offer UV protection, shielding your eyes from harmful UV rays, especially when working outdoors or in environments with excessive sunlight exposure.

Choosing the right safety glasses
When selecting safety glasses, consider the following factors:
- Impact resistance: Ensure the safety glasses you choose have high-impact resistance to protect against flying debris or particles. Look for glasses that meet ANSI Z87.1 standards.
- Fit and comfort: Safety glasses should fit securely and comfortably on your face without causing discomfort or obstructing your field of vision. Look for adjustable features, such as nose pads or temple arms, to customize the fit.
- Lens tint: Depending on the nature of your projects, you may need safety glasses with tinted lenses for outdoor work or clear lenses for indoor tasks. Consider the lighting conditions and the level of glare reduction you require.
- Anti-fog coating: Some safety glasses come with an anti-fog coating to prevent fogging when working in humid or temperature-changing environments.
- Durability: Choose safety glasses made of durable materials that can withstand the rigors of your DIY projects. Look for scratch-resistant lenses for long-lasting clarity.
Remember, safety should always be a priority when engaging in DIY projects. Wearing safety glasses not only protects your vision but also ensures peace of mind throughout your projects.
The importance of having the right tools for your DIY projects cannot be overstated. From hammers to safety glasses, each tool serves a specific purpose and contributes to the success and safety of your endeavors. Whether you’re hanging pictures, building furniture, or tackling larger construction projects, knowing the different types of tools available, their common uses, and tips for using them will make your DIY journey smoother and more enjoyable. So stock your toolbox with these essential tools, familiarize yourself with their functionalities, and let your creativity and productivity soar!
